How to Create Your Personal Account on the ColdProxy Website
Creating a personal account on ColdProxy is quick, simple, and will allow you to manage your services efficiently. Follow the steps below to set up your account and start using our platform with ease.
1. Visit the ColdProxy Website
Go to the official website: https://coldproxy.com/

From the homepage, navigate to the Client Dashboard. This will redirect you to the Login Page: https://members.coldproxy.com/login
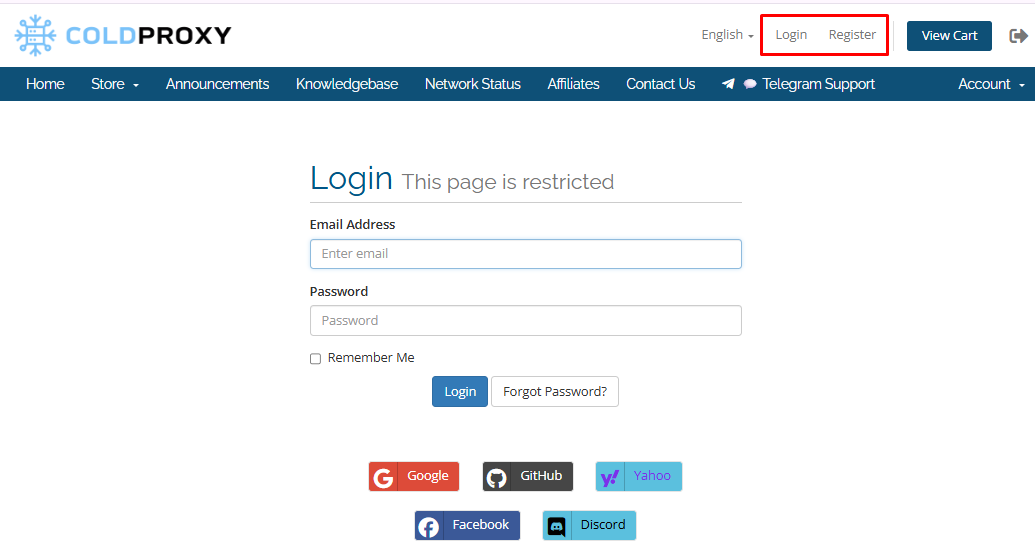
2. Login or Register
-
Already have an account? Simply enter your username and password and click Login to access your account.
-
New to ColdProxy? Click on Register to create a new personal account.
Tip: If you prefer a different language, you can select your preferred language on the login page before proceeding.
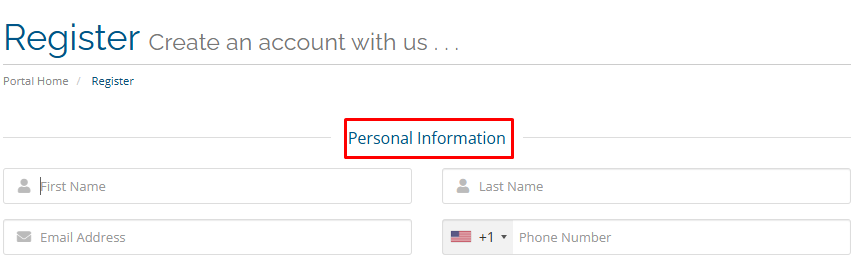
3. Complete the Registration Form
On the Register – Create an Account with Us page, you will see several sections. Fill in the required information carefully to ensure smooth account setup.
- Personal Information
Enter your personal information in the respective fields: First Name, Last Name, Email Address, and Phone Number (include country code, e.g., +1) Make sure your email is correct, as this will be used for account notifications and password recovery.
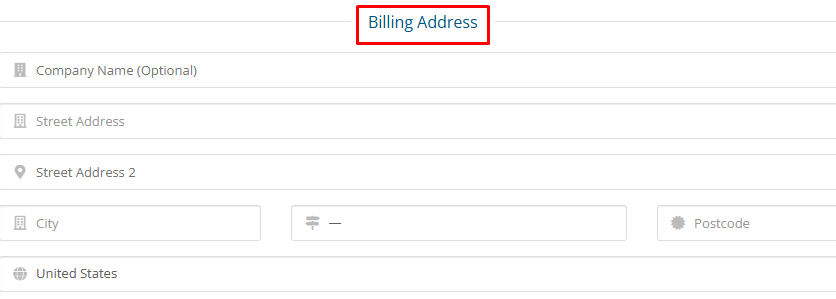
- Billing Address
Enter your billing information, including your address, city, and country. Accuracy is important for smooth payment processing.
- Additional Information
Additional Information Select how you found us from the following options.

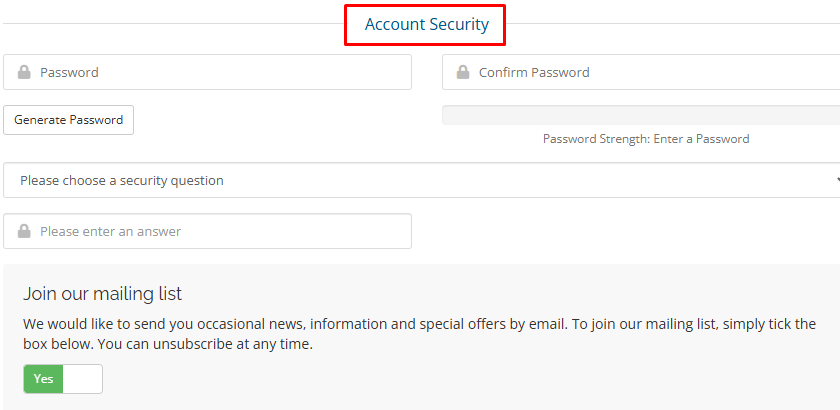
- Account Security
Choose a strong password and confirm it in the provided fields. A strong password helps protect your account from unauthorized access.
Also, choose a security question from the options provided.
Tip: Avoid simple or commonly used passwords and consider using a mix of letters, numbers, and special characters.
4. Agree to Terms and Register
Before completing your registration:
- Check the Terms of Service box to confirm your agreement.
- Click Register to finalize your account creation.

5. Confirmation
Once you have successfully registered, you will receive a Welcome Email from ColdProxy confirming your account setup.
You can now log in and start managing your services. Be sure to keep your login credentials safe and remember your password for future access.
Enjoy seamless access to all your proxy services with your new account.
